
Queen's Domain Combat Guide: The Stamina Argument
Queen's Domain combat explained: stamina budgeting, charged attacks, weapon specials, dash's missing i-frames and spacing rules that keep you alive.
Queen's Domain combat looks like a Souls game from a distance and plays like a first-person King's Field up close. There is no dodge roll, no parry, and no i-frames on the dash attack. Every fight is an argument about stamina and space, and the enemy wins the argument if you spend both.
This guide covers the loop, the numbers you can actually observe, and the drills that make the first three bosses survivable.
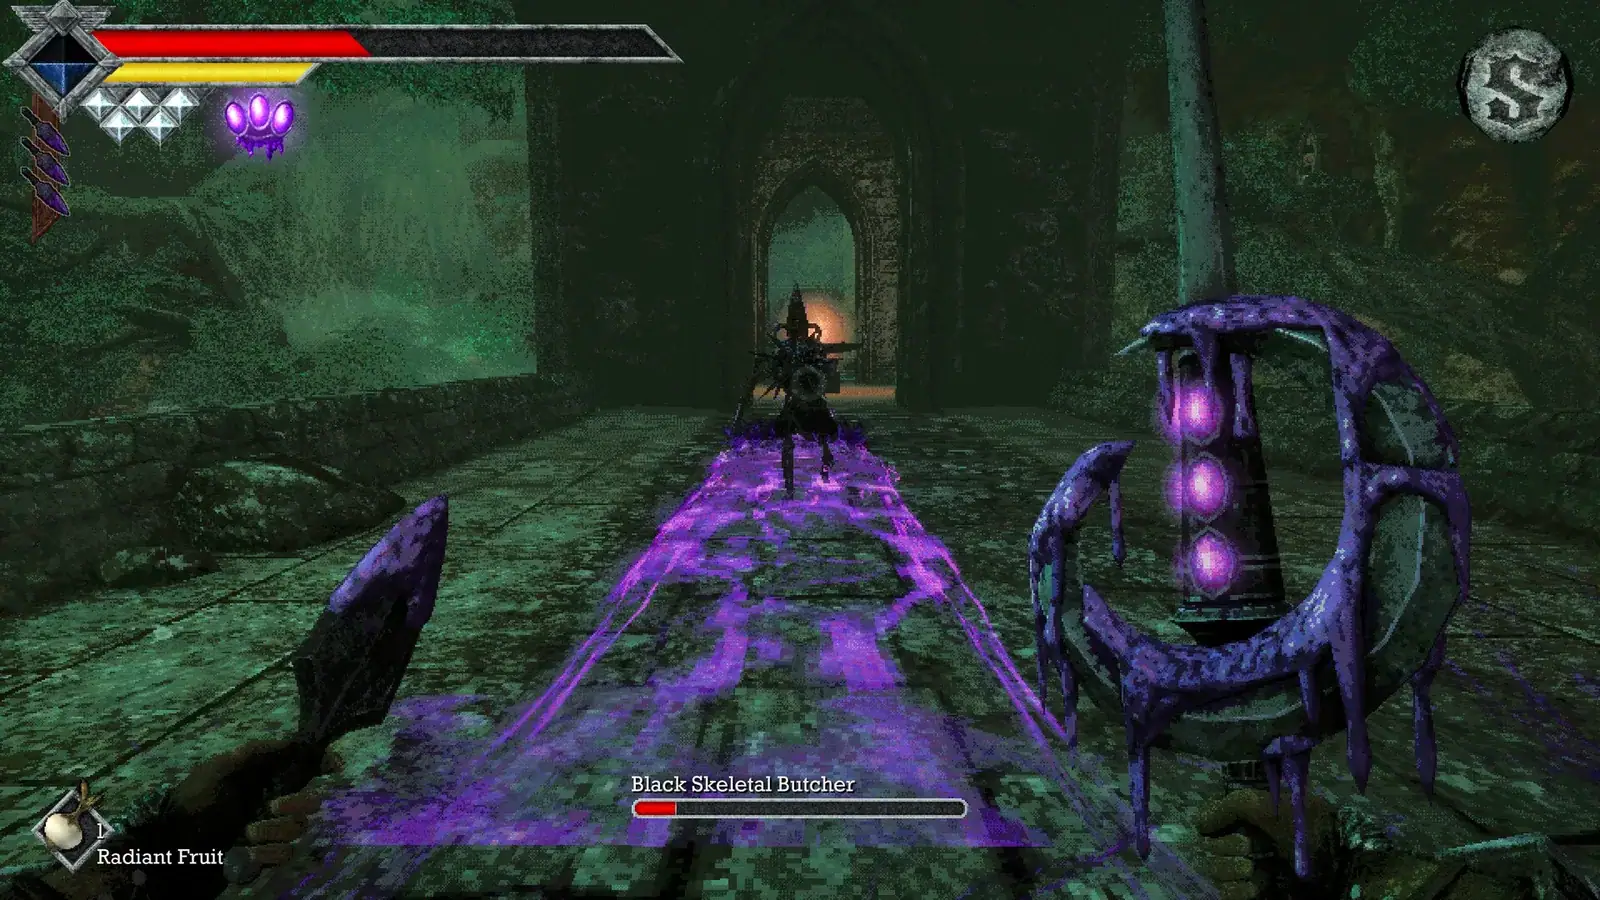
The combat loop in one paragraph
Enter with a full stamina bar. Let the enemy commit to an attack. Move around the attack rather than away from it. Land one light hit or one charged hit, depending on the recovery. Throw during the walk-back. Leave with a quarter bar. Repeat until the enemy is dead.
That is the whole game. The complexity is in reading which attacks you are allowed to walk around and which ones require you to leave the room.
Stamina: the only resource that matters
Every action draws from the yellow bar:
- Light attack: small cost, short recovery.
- Charged attack: large cost, long wind-up, long recovery.
- Weapon special: weapon-dependent; some are cheap, some empty the bar.
- Jump: small cost.
- Dash attack: medium cost, no invincibility.
- Sprint: continuous drain.
The bar does not refill while you attack. It refills when you stop. That means the correct moment to attack is after the enemy's recovery, not during your own circle.
With an empty bar you cannot jump, dash, sprint or throw. The enemy's next swing is unavoidable. Treat the last quarter of the bar as health, not as damage.
Charged attacks: the damage, not the opener
The charged attack is where the game's damage lives, and it is also the easiest way to die. The wind-up is long enough for most enemies to step out of range or hit you first.
Use a charged attack when:
- The enemy has just hit the floor or a wall and is in recovery.
- The enemy is walking toward you from outside its attack range.
- You have a pillar or doorway to break the line if it goes wrong.
Do not use a charged attack as an opener. The enemy's first reaction is usually faster than your wind-up.
Weapon specials: the identity
Every weapon has a special attack, and the special is the reason two weapons with the same damage number feel different. Judge a special on three things:
- Start-up: can you use it after a boss whiff?
- Recovery: if it misses, can you still walk away?
- Stamina: does it leave you at zero?
A special that deals more damage but leaves you empty is a boss-run loser. A special that deals less but resets is a boss-run winner.
The dash attack is not a dodge
This is the most important sentence on the page. The dash attack moves you toward the crosshair, and it has no invincibility frames. It is a gap-closer and a punish, not an escape.
Use it to:
- Close distance after an enemy whiffs.
- Cancel the recovery of a charged attack (if the timing is right).
- Reposition around a slow enemy's side.
Do not use it to:
- Escape a swing (you will eat the hit).
- Cross a boss's attack (there is no i-frame).
- Panic. Panic is what the stamina bar punishes.
Spacing: fight around, not away
Backpedalling is the beginner's instinct and the corridor's favourite trap. The game's enemies are designed to step forward with their swings, so retreating in a straight line runs you out of room and into the follow-up.
The correct movement is lateral:
- Circle toward the weapon side. The swing's arc leaves a pocket on the side it started from.
- Break the line with geometry. A pillar, doorway or statue stops a spear thrust and gives you a free punish.
- Jump over low sweeps. The jump has a cost, but it is cheaper than eating the hit.
- Leave the room if you have to. There is no shame in resetting a fight you cannot read.
Throwing: the free action
Throws do not stop your feet. They run on a cooldown, not ammo, and they are the only attack you can land while repositioning. The throwing weapons page covers the full loop, but the combat rule is simple: throw before you commit.
A throw at the start of a fight pulls one enemy out of a group. A throw during a boss's approach is free damage. A throw after your melee is a throw into a fight that is already decided.
Reading enemy tells
The launch build's enemies share a small vocabulary:
- The long wind-up: a heavy attack; walk around it, do not back up.
- The forward step: the attack will close the gap; circle, do not retreat.
- The hop back: the enemy is resetting; throw, do not chase.
- The shield raise: the front is closed; wait for the commit or use impact.
- The projectile wind-up: strafe, do not sprint; sprinting empties the bar you need for the punish.
Bosses use the same vocabulary with longer timings and bigger geometry. The boss guide applies it fight by fight.
Status effects and healing
The HUD's status icons are the game's warning system. A skull, a leaf/shield and a claw all mean something is ticking; cleanse it before it becomes the reason you die. Panacea and cleansing items exist for this.
Healing is a commitment. Drinking an elixir in the open is a free hit for the enemy. Heal after a long recovery, behind a pillar, or after a boss commits to a projectile pattern.
Three drills for the first hour
- The one-hit drill: fight a courtyard enemy using only one light attack per opening. No charged attacks, no specials. Learn the reset.
- The throw-pull drill: pull one enemy out of a pair with a throw, kill it, then fight the second. Do this until it is automatic.
- The empty-bar drill: enter a fight, spend half the bar, then stop attacking and circle until it refills. Learn what "half" feels like.
These drills are boring for ten minutes and save hours later. The beginner guide puts them in the opening route.
What changes with a build
- Balanced: the drills above are the whole game.
- Impact bruiser: replace the one-hit drill with a charged-hit drill; you are learning the wind-up, not the poke.
- Thrower: replace the one-hit drill with a throw-pull-throw loop; your melee is a finisher.
The build guide has the loadouts, and the weapons page explains how to judge a new weapon's recovery before you commit.
Sources
Official source: Queen's Domain on Steam — official store page with the feature list, PC requirements and launch details.
- Queen's Domain preview — Rock Paper Shotgun — preview of the first-person combat, throwing daggers and dual-wield loop.
- PC Gamer preview — Queen's Domain — hands-on footage of the first-person combat and dungeon layout.
FAQ
Is there a parry? No parry system has been confirmed.
Can I cancel an attack? The dash attack can cancel some recovery, but it has no i-frames. Do not treat it as a cancel button for a missed swing.
Why do I keep running out of stamina? Because you are attacking during the enemy's guard, not after its recovery. Attack less, circle more.
Is combat faster later? The tools get stronger, but the stamina economy does not change. The pace is deliberate by design.
More Queen's Domain Guides
A complete Queen's Domain demo walkthrough: the shore route, the library detour, the burial-area puzzle and the skeleton boss, plus every demo achievement.
The Queen's Domain FAQ: release date, platforms, price, game length, co-op, demo saves, respec, endings, map, Steam Deck and the Souls comparison.
Queen's Domain food explained: which meals raise stats, which items only heal, where the Roasted Ojum Lizard fits and when to eat before a boss.
How the Holy Sword Endu works in Queen's Domain: the shoulder-button flight, how upgrades extend distance, and how to read a gap before you jump.
A practical Queen's Domain map: the confirmed regions of the Isle of Neasied, how they connect, one-way drops and navigating without a map screen.
Queen's Domain is out now, October 30, 2026, on PC, PS5, Xbox Series and Switch 2. Price, launch discount, length, demo and Steam Deck status.
A roundup of Queen's Domain reviews and previews: the 9/10 Wand Report verdict, RPS on its King's Field lineage, and the criticisms worth knowing.
Where Queen's Domain saves, how crystal monuments work, what respawns after death and which one-way drops you should never take without resting.